Wednesday, February 1, 2017
Reset Ink Counter Canon Pixma iP1000
Reset Ink Counter Canon Pixma iP1000
Heres some tips for your Canon Pixma IP1000. I have two IP1000 printer, one is broken because the head need to be replaced, but the other is still powerful. I like this printer because the simple operational
the low budget, the one that I like most is the fast printing.
The problem that I have when using this printer is when the ink waste absorber is full, and he start to blink. Ok guys, Heres some tips for you who still use this printer.
Reset waste ink tank counter CANON PIXMA iP1000
STEP 1:- Disconnect printer from AC power
STEP 2:- Press and HOLD the POWER button, and connect printer to AC power
STEP 3:- release the the POWER button
STEP 4:- Press the POWER button again
If your IP1000 Blinking try this Tips :
Step 1: Manual for Service mode
1. Unplug POWER and USB cables.
2. Open door, PRESS and HOLD the POWER button.
3. Connect the POWER cable.
4. Close door, then release POWER button.
5. Power ON your printer a usual (It should not blinking anymore)
Step 2 : Software for Permanant
1. Reconnect the USB cable and turn ON your Printer
2. Open "General Tools for iP1000",
3. Select (USB PORT)
4. Choose CLEAR WASTE INK COUNTER - MAIN
5. Choose CLEAR WASTE INK COUNTER - PLATEN
It should be working, coz my printer now work normally
Notes. Before you decide to reseting the waste ink counter, you should really clean up the ink absorber, or else you will find the ink watse absorber overflow...
Downloadh The Software General Tool canon Pixma iP1000
Driver Canon PIXMA IP1000 Download
Reset_iP1000.pdf
Available link for download

Saturday, December 17, 2016
Reset CANON Pixma iP1000
Reset CANON Pixma iP1000
Dear all reseters
Waste Ink Counter Reset Manual for Service modeStep 1:
1. Turn off the printer. And disconnect the printer cable.
2. Press and hold the POWER button, turn on the printer.
3. The indicator (L.E.D.) should be green.
4. Press and release the RESUME button , the indicator (L.E.D.) should be orange.
5. Press and release the RESUME button again, the indicator (L.E.D.) should be green.
6. Release both buttons.
Step 2 :
Software for Permanant (1st method)
1. Reconnect the USB cable and turn ON your Printer
2. Open "General Tools for iP1000"
Sofware Download: Download
3. Select (USB PORT)
4. Choose (SET DESTINATION 1)
Available link for download
Saturday, November 26, 2016
Reset Ink Counter Level Canon iP1000
Reset Ink Counter Level Canon iP1000
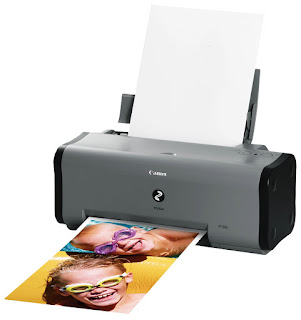
Heres some tips for your Canon Pixma IP1000. I have two IP1000 printer, one is broken because the head need to be replaced, but the other is still powerful. I like this printer because the simple operational
the low budget, the one that I like most is the fast printing.
The problem that I have when using this printer is when the ink waste absorber is full, and he start to blink. Ok guys, Heres some tips for you who still use this printer.
How to physically change the ink waste absorber? Pixma ip1000
The waste ink absorbers can be found at the bottom of the printer case.
Normally youll have to open the printer case, loose the screws of the print unit and remove the hole print unit from the lower part of the printer case.
4 step to Reset waste ink tank counter CANON PIXMA iP 1000
STEP 1:- Disconnect printer from AC power
STEP 2:- Press and HOLD the POWER button, and connect printer to AC power
STEP 3:- release the the POWER button
STEP 4:- Press the POWER button again
If your IP1000 Blinking try this Tips :
Step 1: Manual for Service mode
1. Unplug POWER and USB cables.
2. Open door, PRESS and HOLD the POWER button.
3. Connect the POWER cable.
4. Close door, then release POWER button.
5. Power ON your printer a usual (It should not blinking anymore)
Step 2 : Software for Permanant
1. Reconnect the USB cable and turn ON your Printer
2. Open "General Tools for iP1500", Downloadh The Software here
3. Select (USB PORT)
4. Choose CLEAR WASTE INK COUNTER - MAIN
5. Choose CLEAR WASTE INK COUNTER - PLATEN
It should be working, coz my printer now work normally
Notes. Before you decide to reseting the waste ink counter, you should really clean up the ink absorber, or else you will find the ink watse absorber overflow...
Available link for download
Wednesday, October 12, 2016
Resetter Printers Canon Pixma iP1000 iP1200 iP1300 iP1500 iP1600 1700 iP2200 iP3000 iP4200 iP5200
Resetter Printers Canon Pixma iP1000 iP1200 iP1300 iP1500 iP1600 1700 iP2200 iP3000 iP4200 iP5200
- Unplug power and USB.
- Open door and hold power button.
- Connect power.
- Close door, then release power button.
- Reconnect the printer cable.
- Download
General Tools software Resetter for canon Pixma iP 1500
General Tools software Resetter for Canon PIXMA iP1000 Printers - Run the Software Resetter and select (USB PORT)
- Choose SET DESTINATION 1 And it should be reset.
- Download software for Canon iP1200, iP1600, 2200 Printers.DOWNLOAD Service Tool Software for Canon Pixma Printer iP1200, iP1600, iP2200
- Unzip downloaded file by WinZip, 7Zip, Izarc, etc
- Run GeneralTool.exe
- Select the connected USB port number from USB PORT
- Click LOCK RELEASE, and select the applicable model name in SET DESTINATION
- In CLEAR WASTE INK COUNTER, select MAIN or PLATEN. The selected waste ink counter will be reset. MAIN resets the main waste ink counter, PLATEN resets the platen waste ink counter.
- Turn off Canon Pixma iP1700, iP1300 Printers
- Hold down Resume button and press Power button.
- Keep holding down Power button and let Resume button go.
- Press Resume button 2 times then let BOTH buttons go.
- Green lights will flash and then stop blinking.
- When green lights are solid, press the Resume button 4 times.
- Press the Power button and the Canon Pixma iP1700, iP1300 Printers should turn off, if not, press the Power button once more.
- Your Canon Pixma iP1700, iP1300 Printers should respond as normal
- Download Software Resetter for Canon Printers iP1300 dan iP1700 Software Resetter for Canon Pixma iP1300, iP1700
- Ekstrak/Unrar/Unzip the Software
- run GeneralTool.exe
- Select USB Port where the canon ip1300 or canon ip1700 installed.
- CLick Lock Release button
- Select EEPROM CLEAR
- Click Test Pattern 1 button
- Your Canon Pixma iP1700, iP1300 Printers should respond as normal.
- With the printer plugged in and powered off, press and hold the Resume/Cancel button, then press and hold the Power button. (DO NOT release the buttons. The LED light should be green to indicate that a function is selectable.).
- While holding the Power button, release the Resume/Cancel button. (DO NOT release the Power button.).
- While holding the Power button, press the Resume/Cancel button 2 times, and then release both the Power and Resume/Cancel buttons. (Each time the Resume/Cancel button is pressed, the LED lights alternately in orange and green, starting with orange.).
- When the LED light is green, press the Resume/Cancel button 4 times. (Each time the Resume/Cancel button is pressed, the LED lights alternately in orange and green, starting with orange.).
- Press the Power button. The LED lights in green, and the reset is performed. (When the operation completes, the printer returns to the menu selection mode automatically.).
- Press the power button to exit service mode.
- Turn off the Printers.
- Hold Resume button click POWER.
- Hold button RESUME, release POWER
- Then press the button again twice RESUME.
- Release all the buttons.
- Indicator led in green and stay green.
- Click the button 4 times RESUME, if you want to make another transaction. :Look at the listed below:
1 led- Orange – Service test print 1 times – Orange – Service test print
2 led – Green – EEPROM information print 2 times – Green – EEPROM information print
3 led – Orange – EEPROM initialization 3 times – Orange – EEPROM initialization
4 led – Green – Waste ink counter setting 4 time – Green – Waste ink counter setting
5 led – Orange – Destination setting (Press Power > Press Resume 3x) 5 times – Orange – Destination setting (Press Power> Press Resume 3x)
6 led – Green – Print head deep cleaning 6 times – Green – Print head deep cleaning
11-13 led – Orange, Green, Orange – Return to menu selection
14 led – Green – Left margin correction 14 times – Green – Left margin correction - Turn off the printer POWER button.
Available link for download